|
|
|
|
Model Train Technology Newsletter
June 2020
|
This month we share with you a rebuild of five cabooses with our DCC LED Lighting board installation. The full article is posted on our web site because the pictures are big (and stunning).
|
|
For your convenience, here are the links to our site: (both links work the same but one is easier to remember and type!)
|
|
|
|
|
|
|
|
|

|
|
FIVE Cabooses
Installation of our DCC Decoder LED light Board
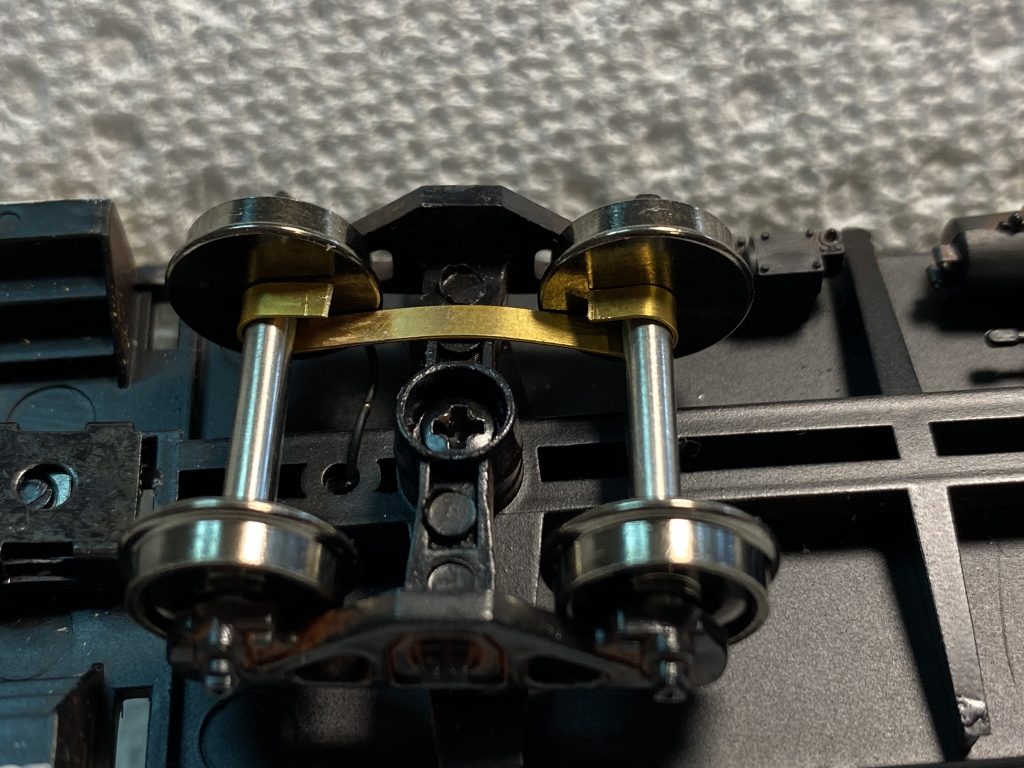
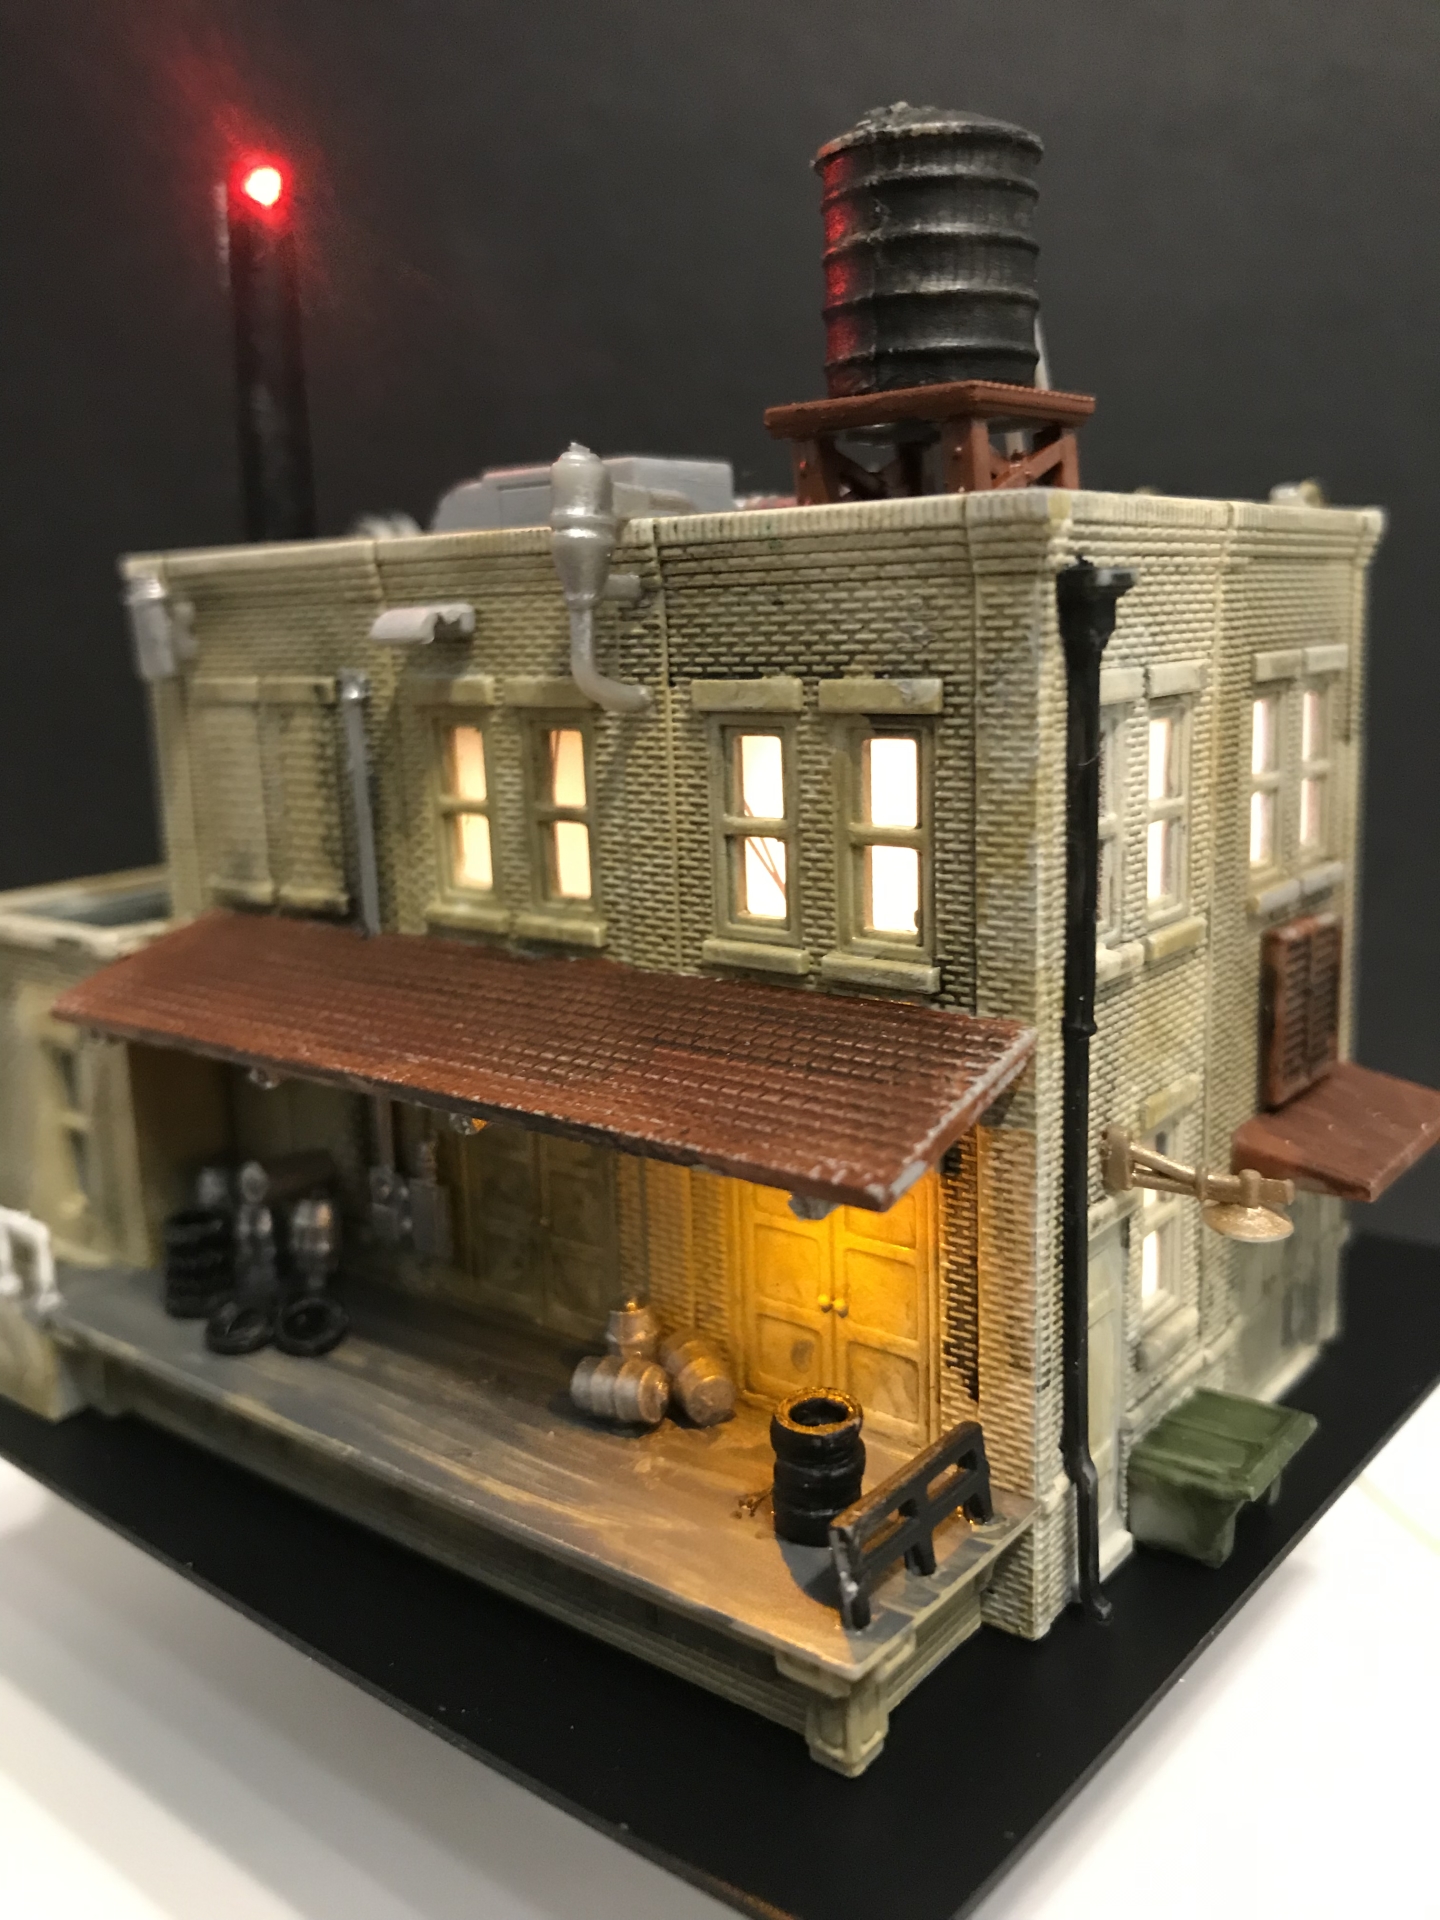
We recently completed the installation of our DCC Decoder LED light board into five HO caboose cars. In the process we had a chance to use several different assembly techniques that I am happy to share. Despite their apparent similarity, including two of identical make and model, they were different enough to warrant some adaptation for each. No two cars were the same, but the general approach is. With a little bit of patience and going slow, you can do this yourself.
|
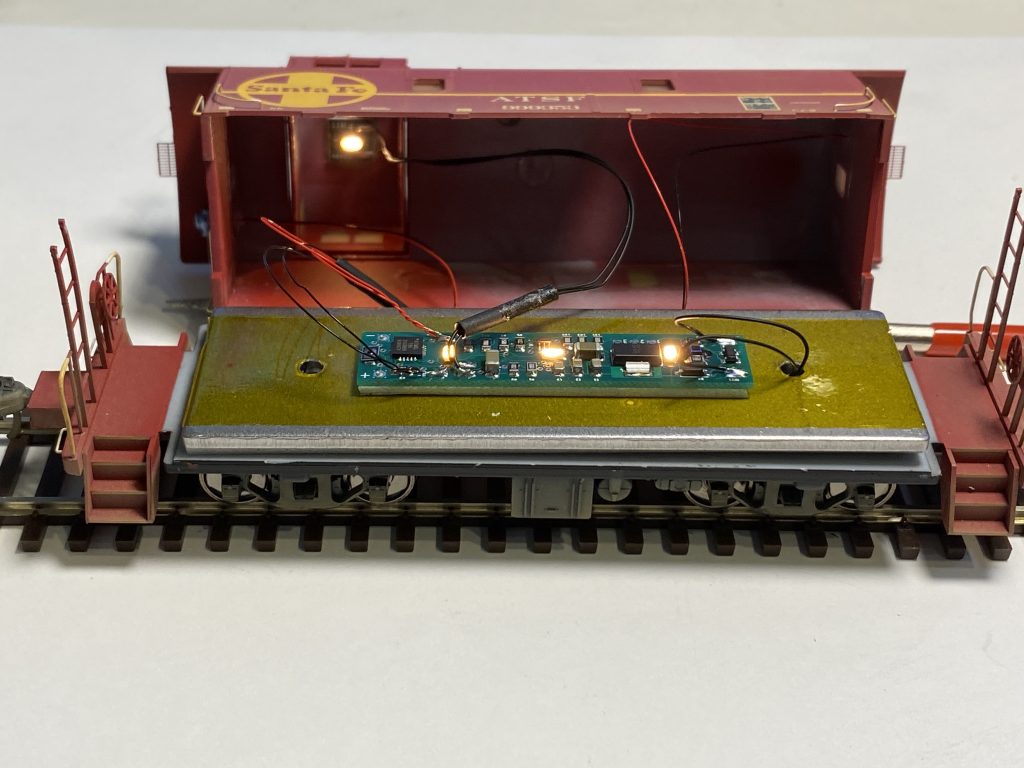
Our LED light board for cabooses fits inside both HO and N scale cars. It has 3 LEDs on the main board plus a set of pads for adding an additional LED connected to the mains. It also has a separate controllable circuit with pads for connecting typically read red LEDs. In N scale installations we use our prewired 0402 RED LEDs and fit them into a hole in the back wall. We fasten them in place with a little bit of Gallery Glass which dried crystal clear. This combination is fine since N scale is small enough it’s both not possible and not necessary to add any kind of fixture.
|
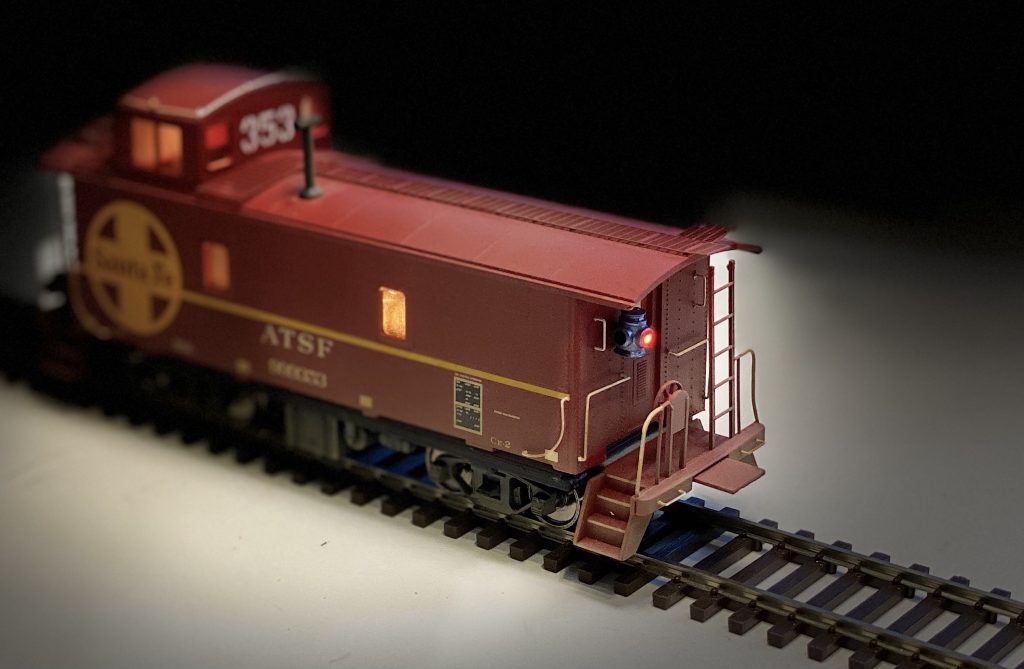
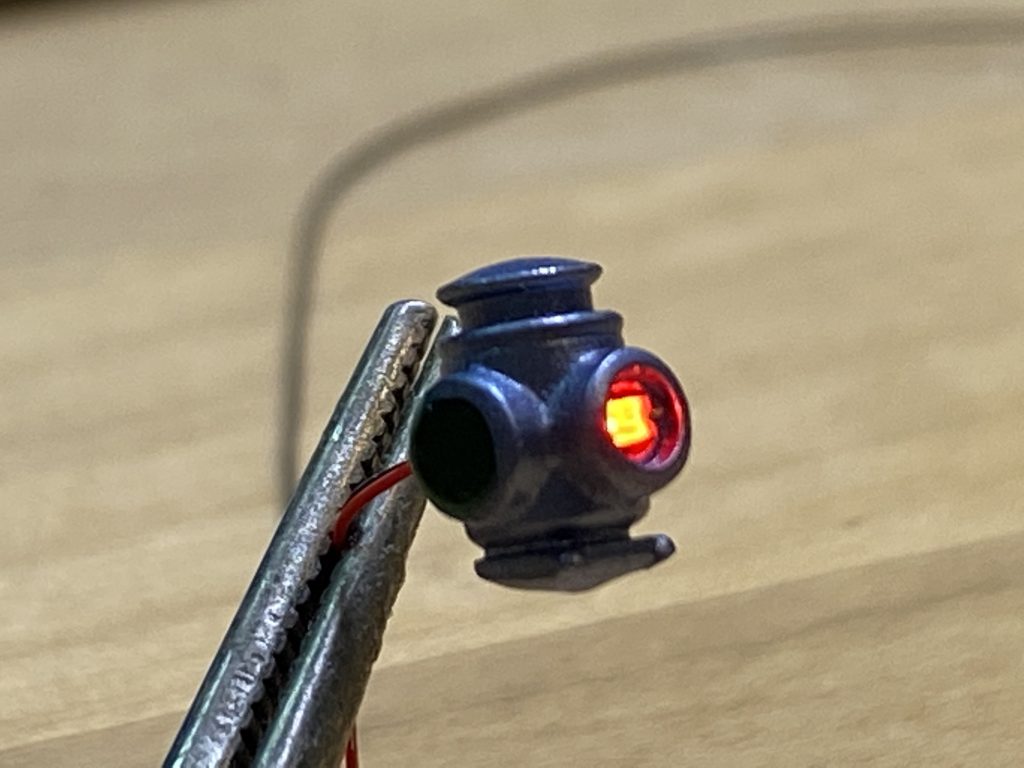
However, when we looked this for the HO cars, we decided a lantern to hold the LED would look better. On the Santa Fe car shown above you will notice a lantern attached to the rear wall. We made that with our 3D printer. This was the first car that we decided to tackle and putting the Decoder board in, changing the wheels, adding the Floating Brass® strips went smoothly. We then started looking around for a HO scale lantern and didn’t have much luck. Then found this picture on Google and decide to see if we could replicate it. Keep reading to see how it turned out.
|
|
|
|
DCC Decoder LED light board with flickering, blinking effects and two channel control
|
|
Here is a list of the Steps:
|
- Disassemble the car and remove the weight
- Replace wheel sets with one-wheel insulated side.
- Install Model Train Technology Floating Brass® electrical pickups
- Attache double stick tape, Kapton tape to weight
- Attach and connect DCC LED Light Control Board
- Assemble and attach Cupola LED Chip light
- Install 3D printed Lanterns
- Connect wires to LED decoder board
- Test and reassmble
- Take pictures
|
|
|
See how to install our "Floating Brass" wheel pickup
|
|
|
|
|
|
|
|
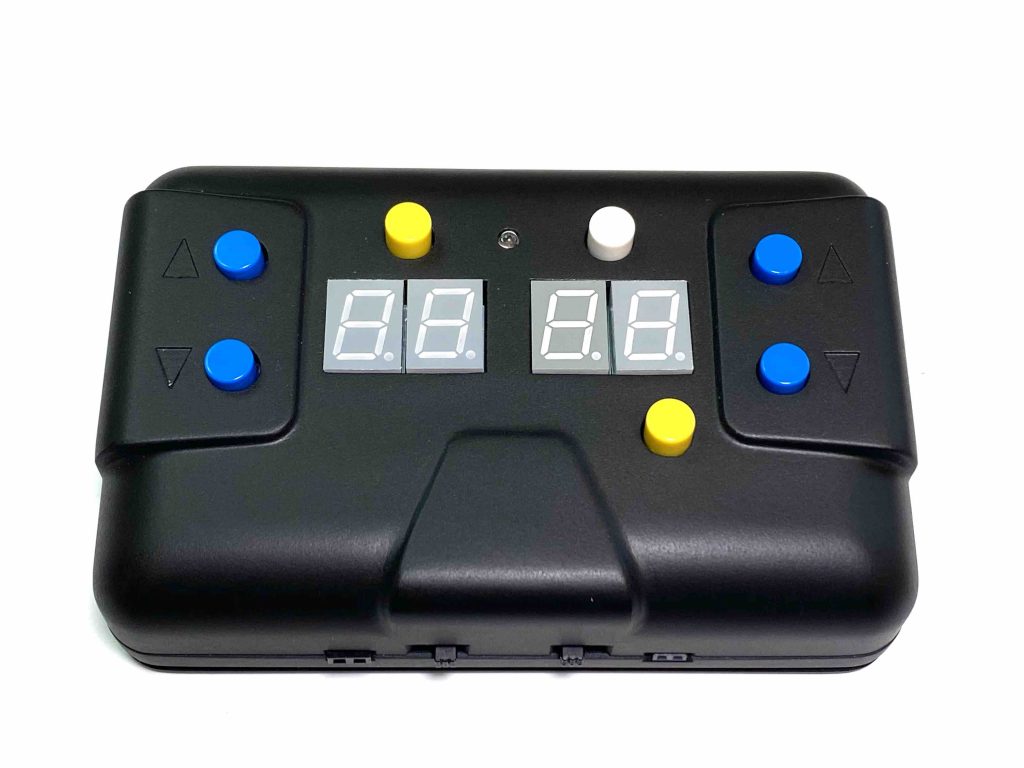
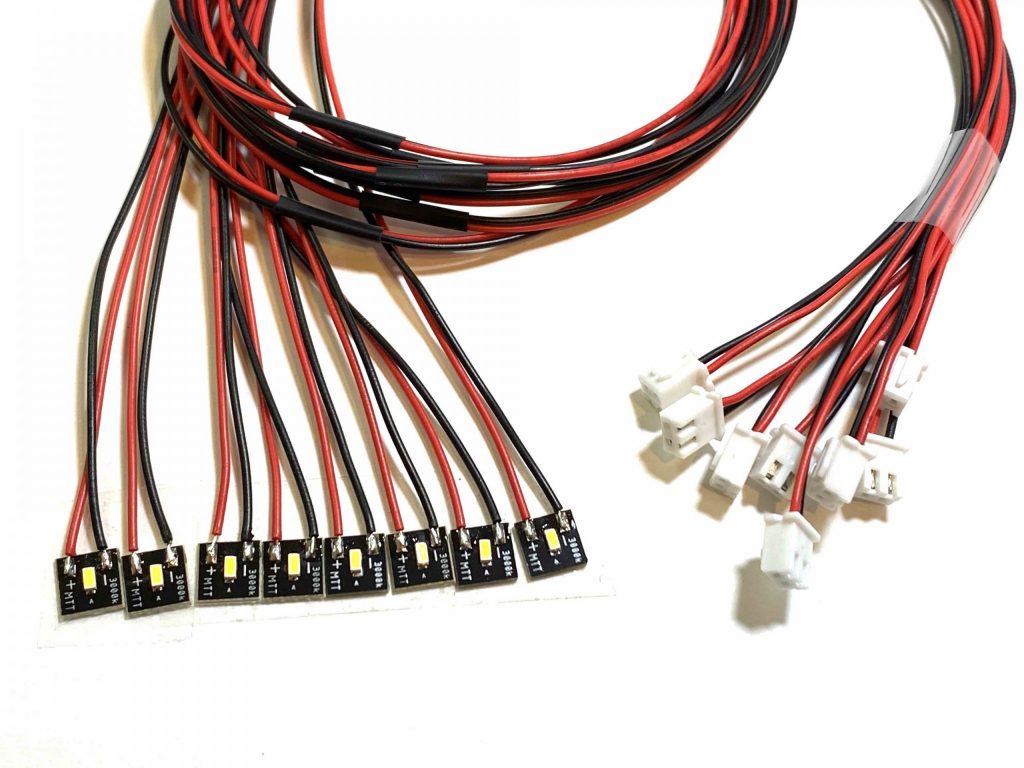
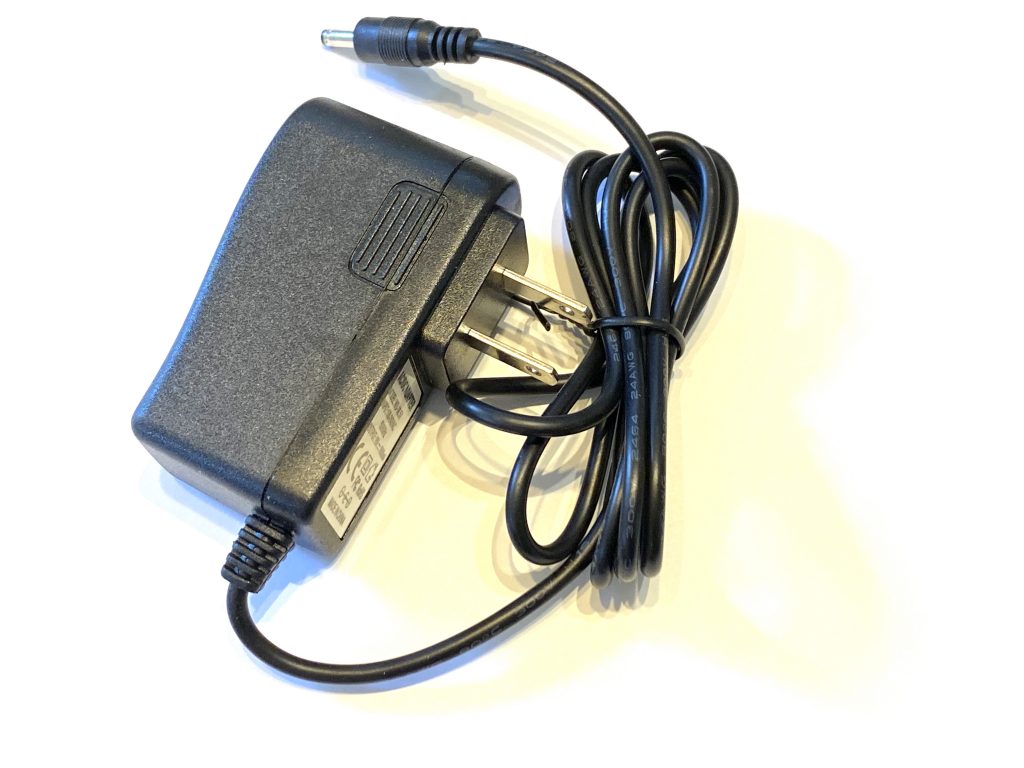
LED Scene Controller Bundle Package cost savings
|
Our LED Scene Controllers are seeing increasing interest from all scales of modelers. What has surprised us is how many people are now buying the kit which comes with 16 prewired LEDs (your choice of four colors of white), with connected JST plugs and a power supply. Our Controller is 100% compatible with all Woodland Scenic lights – you can just plug them into out controller and now you have 100s of animation setting that you can control. You can have all 16 LED up and running in about 60 seconds! And, you can save a TON of money by using our system and buying our LEDs – they are HALF the price of Woodland Scenic. Standard price of all the items is $195 with the bracket and power supply. Now the On Sale bundled price is $169.00.
|
|